Export to PDF
QuickPlanX offers the capability to export your projects to PDF files, allowing you to share or print your projects easily. This guide will walk you through the steps to export either the entire project or a specific branch as a PDF document.
Export Entire Project
-
Tap the
···button located at the top-right corner of the toolbar to access the export menu. -
Select
Export→PDFfrom the menu options.Customize ToolbarYou can customize the toolbar to include the Export → PDF button for quicker access. Learn how to customize the toolbar display.
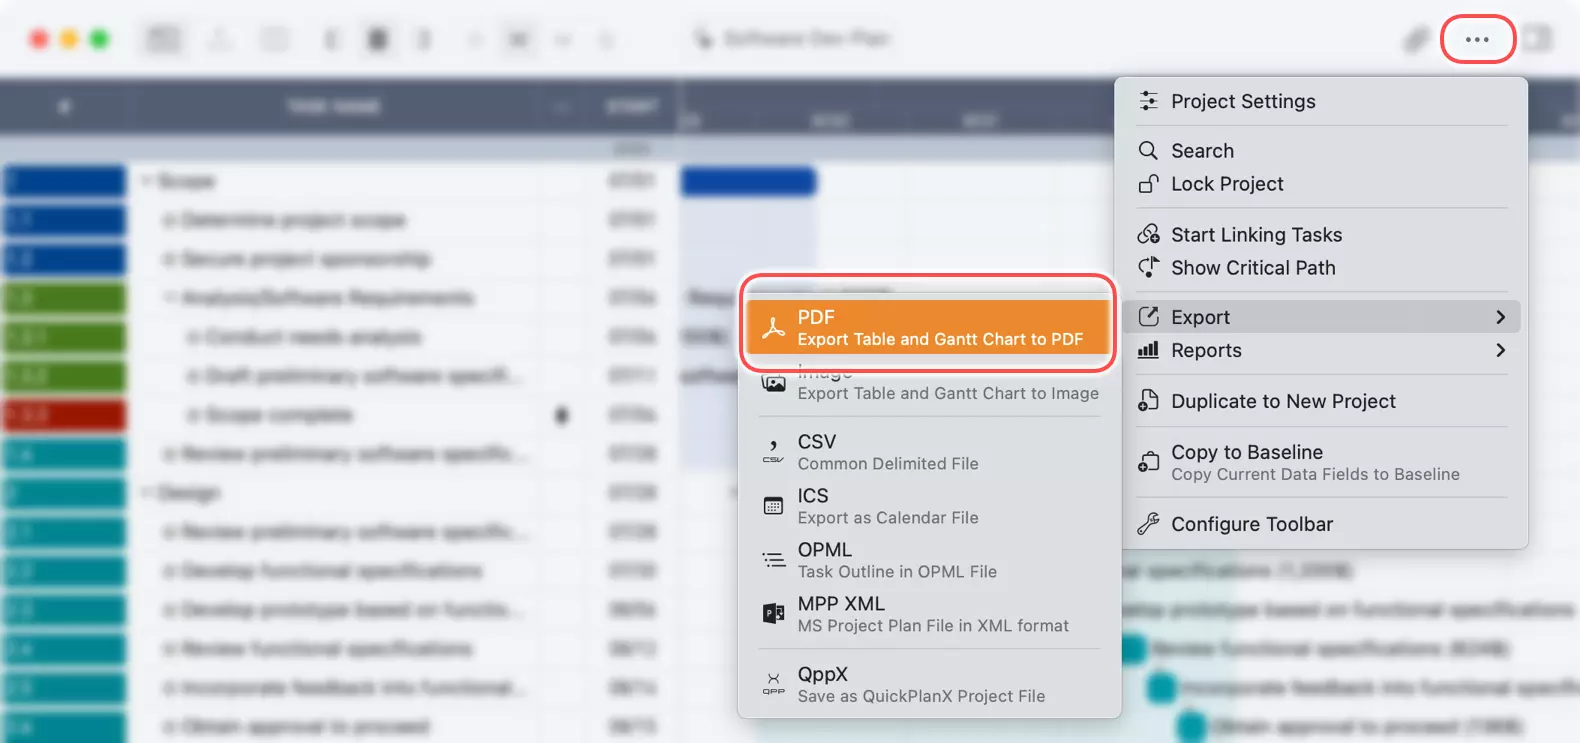
Once you've exported the project, you can save the PDF file to your device.
Export a Specific Branch
On Mac
- Select the Branch: Click on a group task or a subproject task that represents the branch you wish to export. If you select the root task, the entire project will be exported.
- Context Menu:
Right-clickorCtrl+clickon the task to open the context menu. - Export Option: Choose
Export→PDFfrom the context menu. - Save the PDF file to your desired location on your Mac.
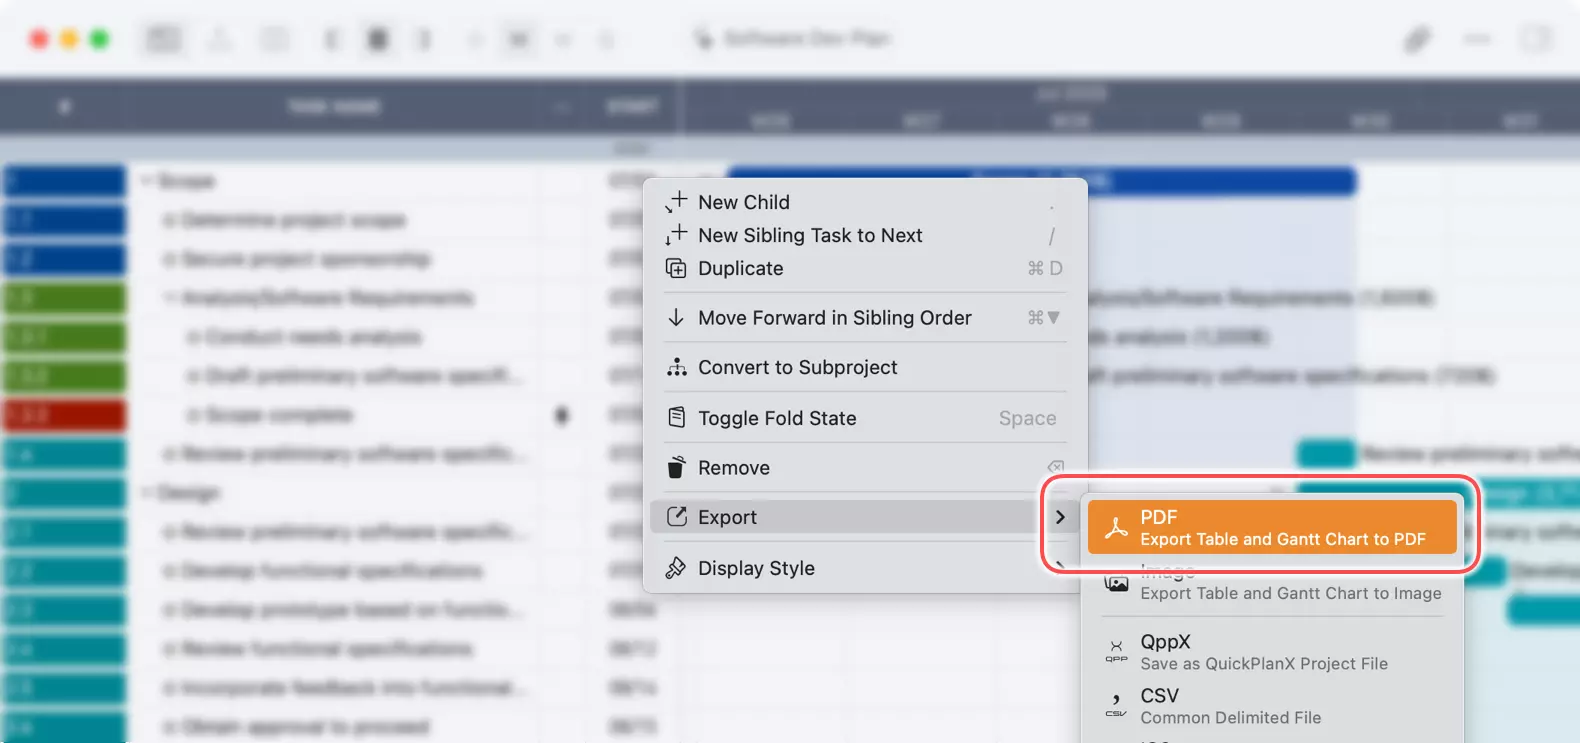
On iPhone and iPad
- Choose the Branch: Tap on a group task or a subproject task that represents the branch you want to export.
- Action Bar: Tap the
···button on the action bar to view more options. - Export Selection: Select
Export→PDFfrom the menu. - Save the PDF file to your desired location on your device.
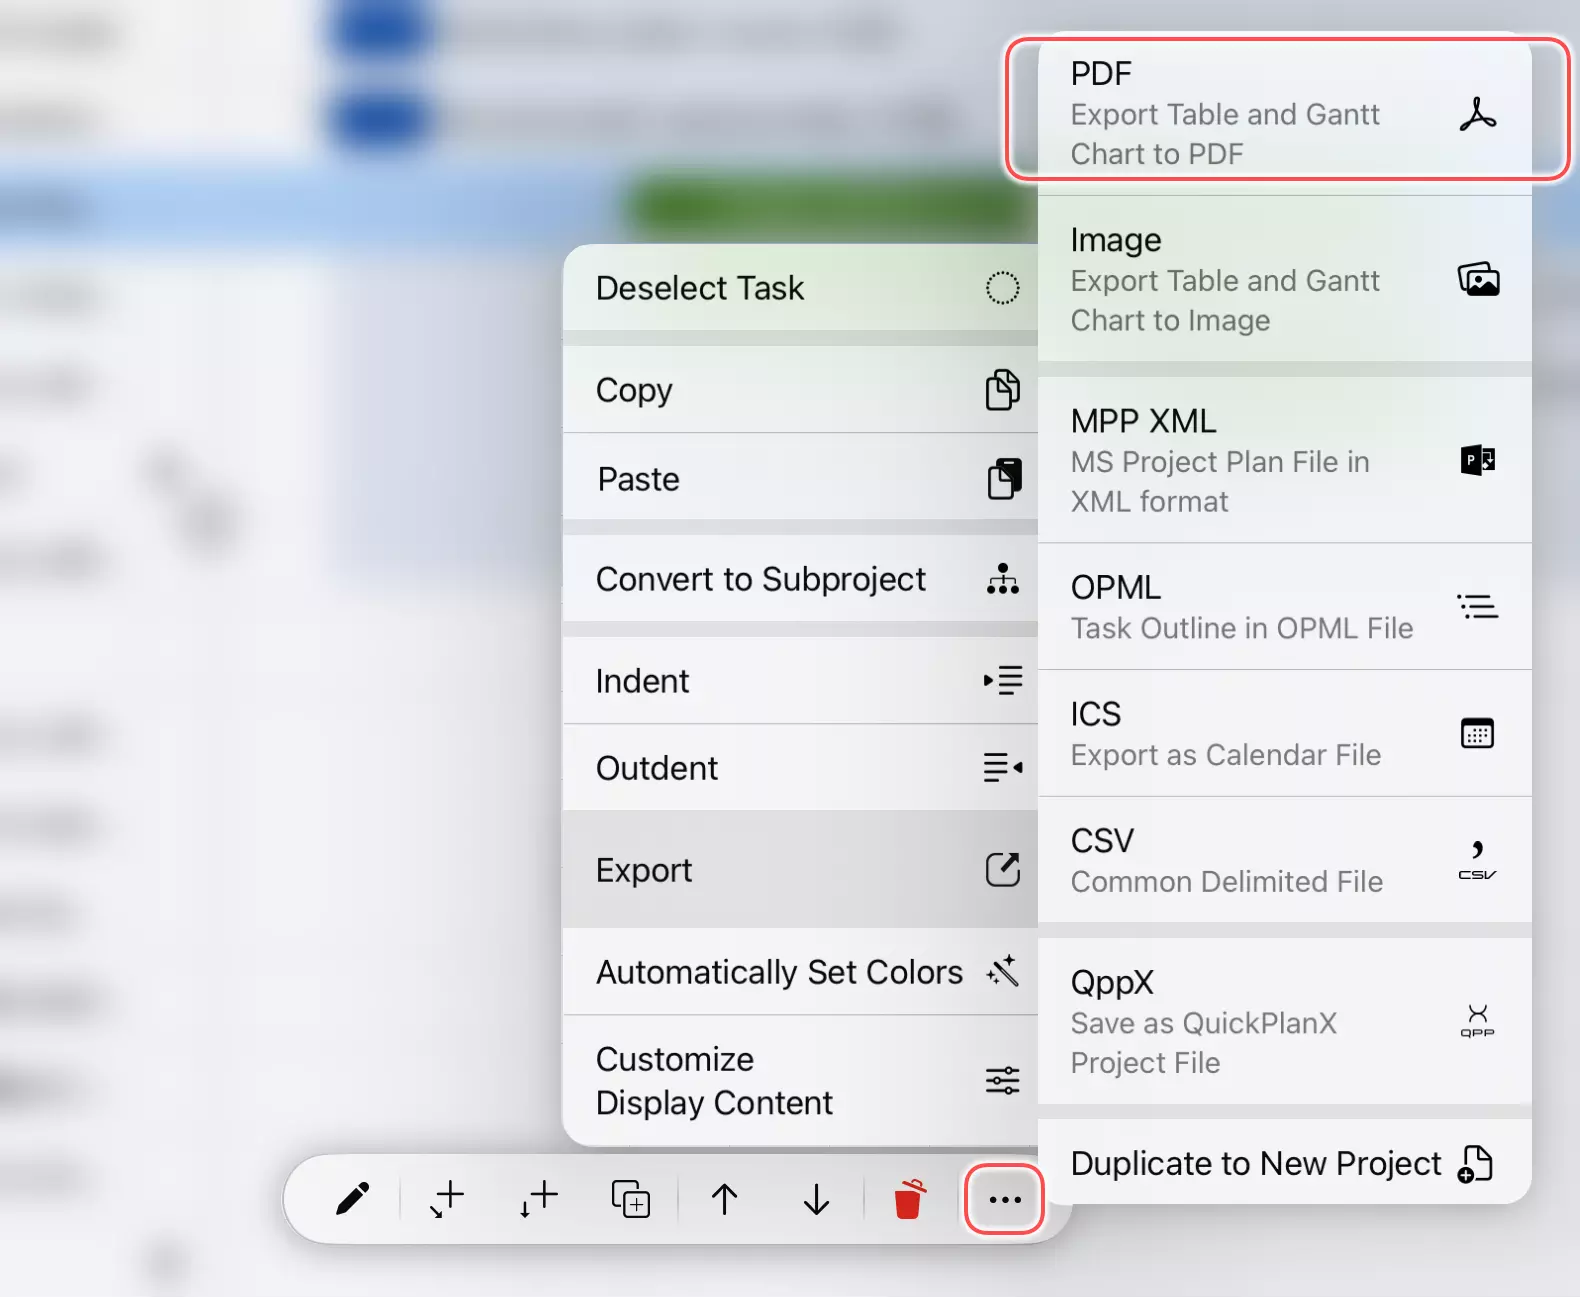
By following these steps, you can quickly and easily export your projects to PDF format, ready for sharing or printing.
Additional Notes
Printing Considerations
QuickPlanX provides more comprehensive options to control the PDF output than the system print panel. For optimal printing results, we recommend exporting your project to a PDF file first rather than using direct printing.
Large Project Printing
Printing large projects presents unique challenges due to their extensive scope and detail. For detailed guidance on handling large project prints effectively, please refer to our discussion about print challenges.
Partial Export Options
As described in this article, you can select a group task or subproject task to export only the selected portion of your project.
QuickPlanX also allows you to duplicate an entire project or part of a project to create a new project, with options to control the time period and content of the output. If you need to export only a specific time period of your project to PDF, you can first duplicate the relevant portion and then export the new project.
Updates
Date Range Export (v4.0)
QuickPlanX 3.0 adds a Custom Range option in the PDF Options panel. Turn it on, then pick a Start and Finish date to focus the PDF output on a specific period. Date pickers respect the project calendar — non-working days are disabled and dates are constrained by the exported root task's schedule. When Custom Range is off, the PDF uses the full project or root-task schedule as usual.
- Tasks that overlap the selected range are included; tasks that do not are excluded.
- A task is still included if it only partially overlaps the range (e.g., it starts before or ends after the chosen dates).
- A group task is removed if none of its children remain after filtering, even if the group itself overlaps the range.
- The Gantt chart timeline width is scaled to the selected range.
- Table values (cost, work, totals, etc.) reflect the real task data and are not recalculated or prorated for the chosen period.
Custom Range filters the PDF output only. It does not modify the project schedule.