How to Use Status Day
Status Day, introduced in version 3.0, gives you a structured way to review a project at a specific point in time and bring delayed work back into alignment with your plan.
Use it when your project has drifted from reality — some tasks may have progressed but not been recorded, while others may need rescheduling because the work simply did not happen as planned.
What Status Day Does
Status Day lets you pick a status date, see which leaf tasks are delayed, and apply one of two targeted updates:
- % Complete — update recorded completion values for tasks that progressed but were not logged.
- Start Date — reschedule delayed tasks while preserving their original duration.
All changes are previewed before they are applied, the project working calendar is respected, and every update is fully undoable.
When to Use It
Status Day fits naturally into regular review moments:
- Weekly project cleanup
- Status report preparation
- Reviewing a subproject that has fallen behind
- Reconciling the plan after several days of real-world work
- Moving unfinished work after a missed schedule window
It is not an automatic repair tool. Status Day surfaces delayed tasks so you can make a deliberate, informed decision about what should change.
Open Status Day
- Open the project you want to review.
- If you only want to review part of the plan, navigate into the relevant subproject first.
- Open the project More menu.
- Choose Status Day.
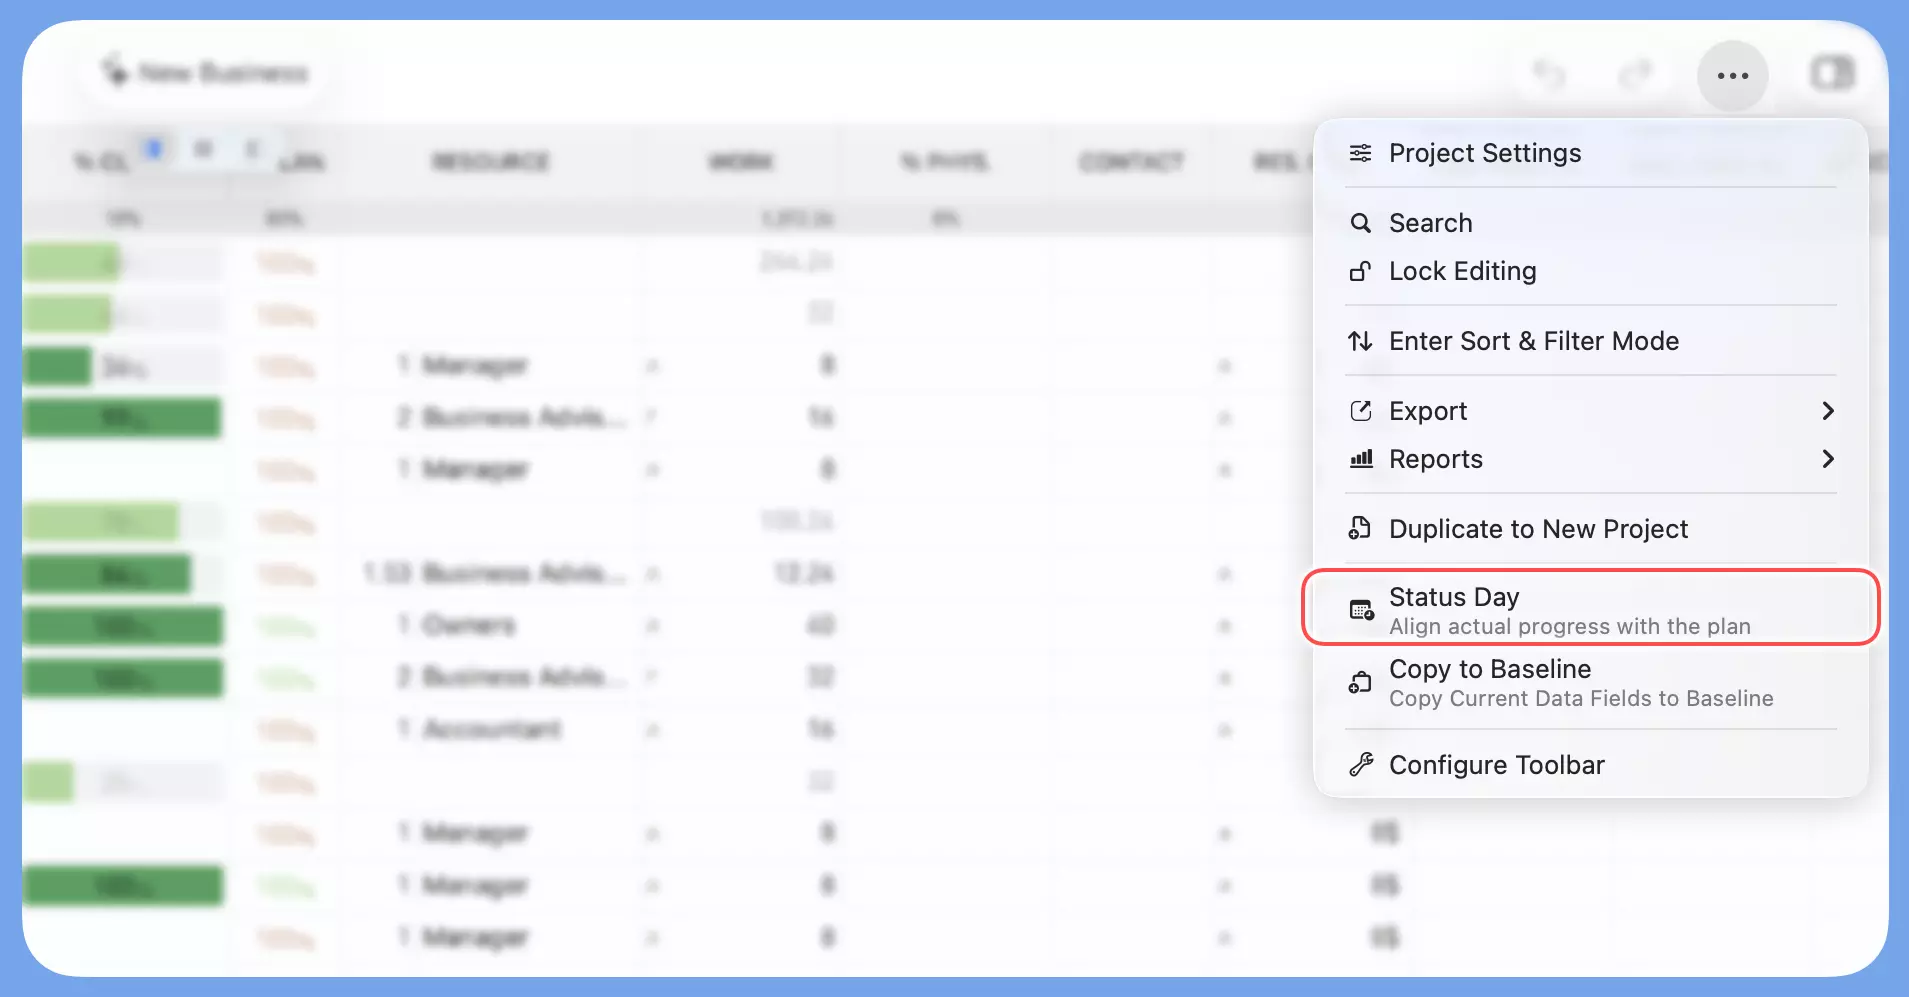
Status Day always operates in the current context. Viewing the whole project applies it project-wide; viewing a subproject scopes it to that subproject only.
The feature is unavailable when the project is locked or when sorting or filtering is active.
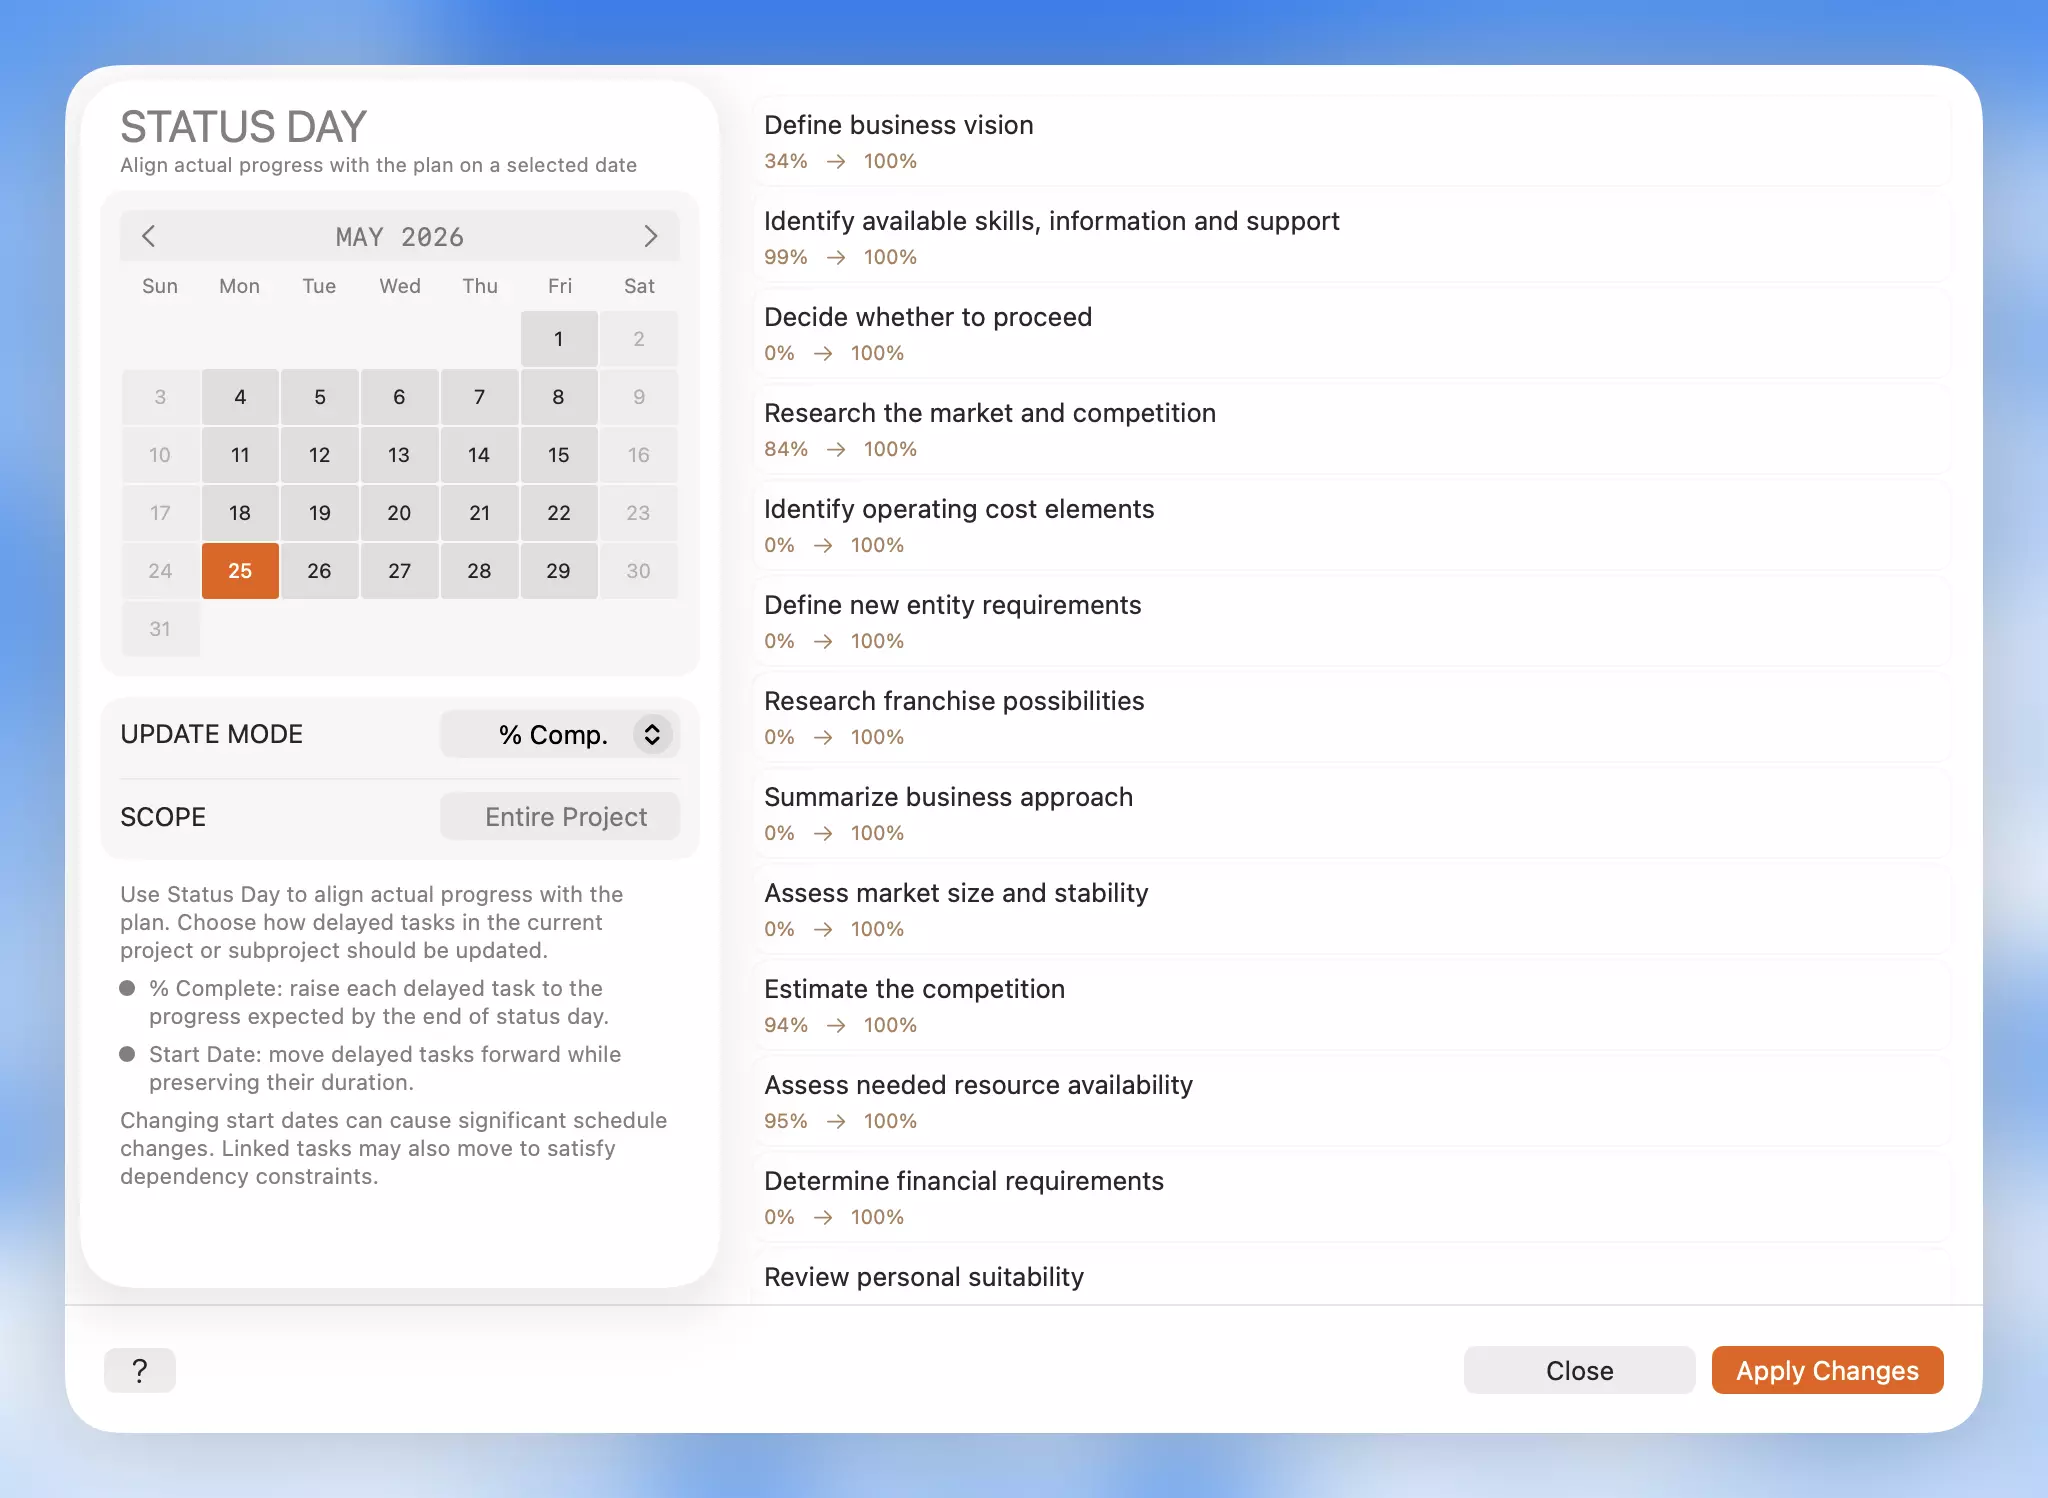
Choose a Status Date
Select the date you want to use as your review point.
Status Day uses the project working calendar. Non-working days appear in the picker but cannot be selected, keeping the date consistent with the project's scheduling rules.
The guiding question is:
By the end of this date, which tasks should have progressed further than they actually did?
Review the Preview
After selecting a date, QuickPlanX shows the delayed tasks that will be updated.
- In % Complete mode, the preview shows each task's current and target completion value.
- In Start Date mode, the preview shows each task's current and target start date.
If no tasks are delayed, Status Day displays No tasks delayed.
Choose the Right Update Mode
Choosing the correct mode is the most important step.
% Complete — When the Work Happened
Use % Complete when a task actually progressed but the project file was never updated.
This mode corrects the recorded completion values without moving any task dates. Choose it when the schedule is still valid but the logged progress lags behind reality.
Start Date — When the Work Did Not Happen
Use Start Date when unfinished tasks need to move because the work was not done as planned.
This mode reschedules delayed tasks while keeping their duration intact. When tasks have dependencies, linked tasks may also shift to satisfy those constraints.
Choose it when the logged progress is accurate but the schedule itself needs adjusting.
Shifting Start Date can ripple across your entire project. Because QuickPlanX preserves task durations and enforces dependency rules:
- Multiple tasks shown in the preview will be rescheduled.
- Linked (dependent) tasks will shift automatically to maintain dependency constraints.
- This affects individual task dates, the overall project timeline, and resource allocations.
Always review the preview carefully before applying changes.
A Simple Rule
| Mode | What It Updates |
|---|---|
| % Complete | The record — what the file says happened |
| Start Date | The plan — when the work is scheduled to occur |
Decide what actually happened in the real project first, then pick the mode that matches.
Apply Changes
When the preview looks correct, apply the changes.
Status Day updates the delayed leaf tasks shown in the preview directly. Group tasks and subproject summary rows are not edited — their displayed progress automatically reflects the updated underlying task data.
If the result is not what you expected, use Undo (Command + Z on Mac, or the Undo button on iOS) to reverse all changes in one step.
Notes on Linked Tasks
When Start Date mode reschedules delayed tasks, dependent tasks may also move to satisfy their dependency constraints.
The preview focuses on directly delayed tasks to keep the review manageable. In projects with complex dependencies, check the timeline after applying Start Date changes to confirm the resulting schedule looks as intended.
Best Practices
- Run Status Day regularly, especially before reporting progress to stakeholders.
- Scope to a subproject when only one area of a larger plan needs updating.
- Use % Complete only when the work genuinely occurred and just was not recorded.
- Use Start Date when unfinished work truly needs to be rescheduled.
- Always review the preview before applying changes.
- Use Undo immediately if the result does not match your intent.